
Laying Waterproof Composite Decks for Outdoor Durability
Composite boards are made from wood fibers and plastics bonded under heat and pressure. Many boards include a protective polymer cap that wraps the core on three or four sides.
11/5/20256 min read
What Makes Composite Decking Water-Resistant
Core and Cap Construction
Composite boards are made from wood fibers and plastics bonded under heat and pressure. Many boards include a protective polymer cap that wraps the core on three or four sides. This cap blocks liquid, slows fading, and resists staining. Because the core is stabilized with plastic, boards swell less than natural wood and are less likely to cup when exposed to rain and sun.
Hidden Fastening and Drainage
Modern systems often use hidden clips that fit in board grooves. These clips create uniform gaps and prevent water from sitting on fastener heads. The result is cleaner lines on the surface and easier drainage between boards.
Benefits of Using Waterproof Composite Decks
Longer Lifespan in Harsh Weather
A capped composite surface shields against moisture, pests, and rot. Boards hold color better, and the structure below sees fewer wet/dry cycles because water sheds more effectively. That translates to fewer replacements and a deck that stays functional across seasons.
Low-Maintenance Outdoor Performance
Routine rinsing is usually enough to keep the surface looking fresh. No annual sanding, staining, or sealing cycles are required. Time saved on upkeep can be spent enjoying the space rather than maintaining it.
Planning the Deck
Assessing Site and Drainage
Slope and Water Paths
Start by studying how water moves around the house. Your deck surface should have a slight pitch—about 3–6 mm per 300 mm (1/8–1/4 inch per foot)—away from the house. This helps move water to the outer edge or to a planned gutter.
Soil and Footings
Soil type dictates footing depth and size. Clay soils may need wider footings; sandy soils may need depth for stability. Set posts below frost depth where applicable to avoid heaving.
Codes, Permits, and Safety
Framing Loads and Spans
Span tables for joists and beams vary by material. Composite manufacturers publish spacing requirements (often 406 mm/16 inches on center for perpendicular installs; closer for angled layouts). Check local building rules for loads, ledger fastening, and guard height.
Railings and Stair Rules
Baluster spacing in deck railings, handrail size, and stair rise/run must meet code. Plan these elements early to avoid rework once framing is complete.
Tools and Materials Checklist
Fasteners and Flashings
Use corrosion-resistant screws rated for treated lumber and outdoor use. Select hidden clip systems that match your board profile. For water management, gather flashing tape, ledger flashing, drip edge, and butyl or EPDM membrane.
Membranes and Tapes
Joist-top tape shields fastener penetrations and slows decay. Self-adhesive flashing membranes protect critical joints like ledgers and beam tops.
Step-by-Step: Laying a Waterproof Composite Deck
Build the Base Structure
Selecting Joist Materials
Pressure-treated lumber is common for framing. Engineered lumber or steel can also be used where spans are long or moisture exposure is high. Whatever you choose, ensure it meets structural loads and matches the fasteners you plan to use.
Joist Spacing, Pitch, and Alignment
Space joists according to the board’s install guide. Keep a consistent pitch away from the house. Snap chalk lines to verify alignment and crown joists in the same direction to produce a flat plane.
Protecting Framing from Moisture
Apply joist-top tape along the full length of each joist and beam. Add post caps and beam wraps where water can sit. These small steps extend frame life.
Install Waterproofing Layers
Ledger Flashing and Wall Interface
The ledger is the most sensitive joint. Install continuous metal flashing tucked behind the house wrap and over the ledger, with end dams or sealant to prevent backflow. Use proper structural fasteners and spacers if the wall requires it, and never rely on nails alone.
Joist-Top Membranes and Beam Wrap
Where two framing members meet, add a membrane between them to block capillary water. Wrap beam tops and tape lap seams so water can shed, not get trapped.
Lay and Secure the Boards
Acclimation and Layout
Let boards acclimate per the manufacturer’s guidance. Dry-fit the first few rows and square the layout to the house. Plan for full-board reveals at edges or use picture-frame borders to hide cut ends and guide water.
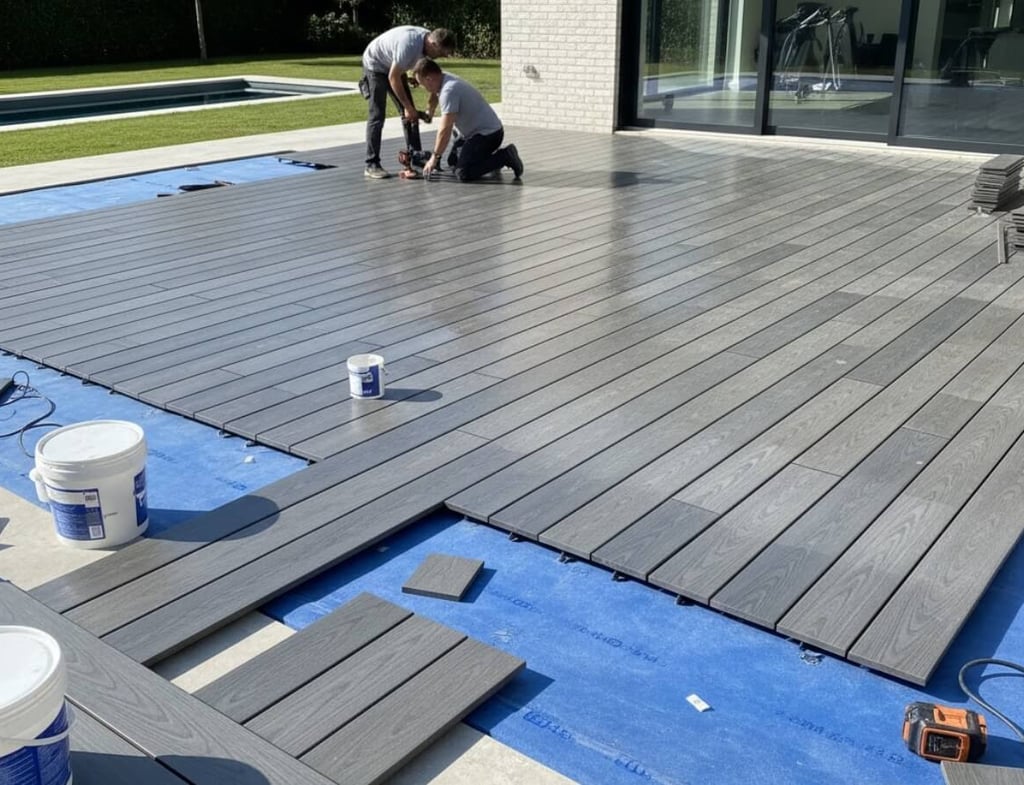
Hidden Fasteners and Screw Techniques
Start with a straight starter board, face-screwed per the guide or secured with a starter clip. Install hidden clips into the groove, then slide in the next board. Where face-screws are required, pre-drill if needed, and keep screws slightly proud of the cap without crushing it.
Expansion Gaps and Movement
Composite deck expands and contracts with temperature. Leave end gaps based on the day’s temperature and install guide. Keep consistent side gaps using spacers, ensuring a clear path for water.
Finish and Seal Transitions
Edge Trims, Fascia, and Skirting
Install fascia with proper clearance to grade. Use color-matched screws and avoid over-tightening. If skirting is used, include vents or gaps to allow airflow and prevent moisture buildup behind the skirt.
Penetrations, Posts, and Lighting
Seal around any posts that pierce waterproof layers using gaskets or boots designed for that purpose. Route lighting cables neatly and keep connections off the ground in dry junction areas.
Design Choices That Improve Durability
Ventilation and Underside Airflow
Clearance and Access: Leave at least 150 mm (6 inches) of clear airflow space under low decks unless your product specifies otherwise. Access panels help with future cleaning and drain maintenance.
Skirting with Vents: If you want a finished look, choose ventilated panels or cut discreet vent slots. Air movement under the frame reduces moisture accumulation and prolongs component life.
Managing Water
Guttering Under-Deck: For second-story decks, consider an under-deck drainage system that catches runoff between joists and channels it to a gutter. This keeps the area below drier and usable.
Drip Edges and Outlets: At the rim, a small drip edge helps move water away from the fascia. Route outlets to planting beds or drains rather than walkways.
Color, Texture, and Heat
Slip Resistance: Choose textures with higher grip if your area sees frequent rain. Narrower grooves can disperse water while still allowing easy cleaning.
Heat Build-Up and Shading: Dark boards can run hotter in direct sun. Consider lighter tones in exposed locations or add shade features like pergolas to improve comfort.
Care and Maintenance
Regular Cleaning
Tools and Detergents: Rinse with a garden hose and use a soft-bristle brush for stubborn dirt. Mild, non-bleach cleaners formulated for composites work well. Always test cleaners in a small spot first.
Stain Removal and Mold: Wipe spills promptly. For oil or grease, use a diluted degreaser. If you notice surface mold in shaded corners, scrub gently and improve airflow in that area.
Seasonal Checks
Fasteners and Movement: Inspect fasteners at the start and end of each rainy season. Check for board movement at butt joints and re-seat clips if needed.
Clearing Drains and Gutters: Keep under-deck drains, outlets, and nearby gutters free of leaves. Remove debris from board gaps with a plastic scraper or compressed air.
Repairs
Replacing a Damaged Board: Most hidden-clip systems allow a board to be removed by freeing the clips along its edges. Replace with a new board of the same profile, preserving the required gaps.
Touching Up Trim: If fascia edges get scuffed, clean gently and replace damaged sections rather than over-sanding. Keep spare trim on hand for quick fixes.
Common Mistakes to Avoid
Flat Framing: A flat surface holds water. Keep the slight pitch and verify with a level as you install each row.
No Expansion Gaps: Tight joints can cause buckling in summer and squeaks in winter. Follow the gap charts based on temperature.
Piercing Waterproof Layers: Random screws through flashing and membranes create leaks. Pre-plan penetrations and seal them with approved products.
Wrong Fasteners: Indoor screws corrode outdoors. Use exterior-rated, manufacturer-approved fasteners and clips to maintain warranties and performance.
Trapping Moisture with Solid Skirts: Solid skirting without vents traps damp air. Add ventilation to protect the frame and maintain deck health.
Build with Confidence—Choose Redrra
A waterproof composite deck should shed water, vent properly, and stay solid underfoot through years of rain and heat. Careful planning, smart framing, correct flashing, and precise board installation make the difference between a deck that struggles and a deck that thrives. If you want a smooth, code-compliant build with clean lines and reliable drainage, Redrra can handle everything from site assessment to final trim. We focus on practical details that boost durability and reduce upkeep, so your outdoor area remains ready for daily use. Reach out to our deck builder to plan, install, and finish your waterproof composite deck the right way once and for the long run.
FAQ’s About Waterproof Composite Decks
Can composite boards make a fully watertight surface?
Composite boards are water-resistant, but not a roof. To keep the space below drier, use an under-deck drainage system and proper flashing at ledgers and edges.
What joist spacing should I use?
Most products call for 406 mm (16 inches) on center for perpendicular layouts. Angled patterns usually need tighter spacing. Always confirm with the board’s installation guide.
Do I need to pitch the deck surface?
Yes. A slight pitch away from the house helps water flow to the rim or a drain. Plan about 1/8–1/4 inch per foot of run.
How do I protect the frame from moisture?
Use joist-top tape, wrap beam tops, and add proper flashing at the ledger. Keep ventilation open under the deck and avoid sealing the skirt.
What fasteners work best with composites?
Use the manufacturer’s hidden clip system where possible and exterior-rated screws for any face-fastening. Avoid mixing metals that can corrode.
Your Home, Your Vision, Our Expertise.
Transforming Spaces with Unmatched Craftsmanship
© 2025. All rights reserved.
Proudly Serving Seattle & King County
Bellevue
Redmond
Bothell
Renton
Issaquah
Sammamish
Kenmore
Seattle
Kirkland
Shoreline
Mercer Island
Woodinville
Newcastle
…and many more across King County!